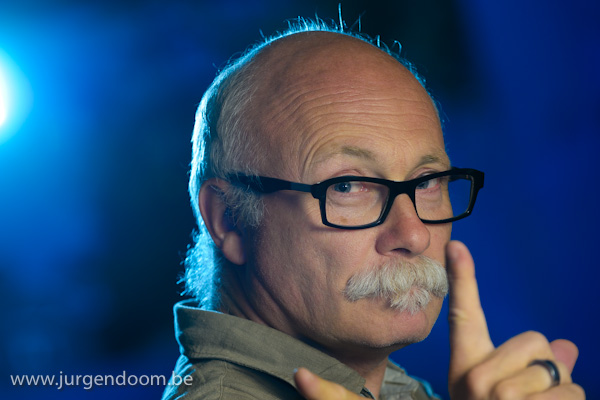
September « 2010 « Jurgen Doom

Workshop flitsfotografie & lightroom 3

28 September 2010 om 13:36 door Jürgen geplaatst in de categorie Flashlight,Photography,workshop fotografie

Workshop flitsfotografie en Lightroom: From Speedlight To Lightroom

Nieuwe datum voor deze eendaagse workshop: zaterdag 23 oktober 2010 in Gent, van 9 tot 18 u.

Fotografen Piet Van den Eynde (Gent) en Jürgen Doom (Leuven) stellen samen ‘From Speedlight to Lightroom’ voor: een intensieve en unieke ééndaagse workshop rond flitsfotografie met reportageflitsen en post-processing met Adobe Lightroom.

Short story

Van flitsende fotoshoot tot afgewerkte grootformaat afdruk onder begeleiding van freelance fotograaf Jürgen Doom en Adobe Certified Expert en fotograaf Piet Van den Eynde. Dat is het concept van deze intensieve, drieledige ééndaagse workshop:

  1. in het eerste deel leert Jürgen je de theorie en de praktijk om met je reportageflitser (Nikon Speedlight, Canon Speedlight of andere losse flitser) betere foto’s te maken;
  2. in het tweede deel toont Piet je hoe je in Adobe Lightroom, hét professionele raw-workflow pakket bij uitstek, je beelden kan corrigeren, retoucheren en bewerken;
  3. tenslotte druk je, onder deskundige begeleiding, de beste foto van de dag af op een grootformaat professionele Epson inkjetprinter.

For who?

Deze cursus is bedoeld voor iedereen die verder wil gaan dan de ingebouwde flitser en de automatische stand van zijn digitale reflexcamera en moeite heeft met externe flitsen. Je leert verschillende mogelijkheden en setups om je flitsfotografie tot een hoger niveau te brengen.

Een fotoshoot eindigt echter niet met de opname. Het unieke aan deze workshop is dat je je raw-beelden daarna onder begeleiding van Piet importeert in Adobe Lightroom om ze te retoucheren en volgens verschillende stijlen af te werken. Je zult leren werken met presets om sneller tot goede resultaten te komen.

Bekijk de video van een workshop hier.

Workshop flitsfotografie door Jürgen Doom and Basiscursus flitsfotografie on Vimeo.

Who’s who?

Jürgen Doom is freelance fotograaf en werkt voor diverse opdrachtgevers, gaande van reclame- en mediabureaus, over redacties van tijdschriften tot bedrijven en multinationals. Door zijn praktijkervaring met flitsfotografie op locatie en ervaring met consultancy en lesgeven, verlopen zijn gestructureerde workshops steeds helder en ‘to-the-point’. Ze zijn praktijkgericht, begrijpbaar en boeiend voor zowel de beginnende als gevorderde amateur- en beroepsfotograaf. Behalve zijn Speedlights kent Jürgen ook zijn Lightroom: hij gebruikt het pakket immers dagelijks voor de bewerking van zijn digitale beelden.

Piet Van den Eynde is eveneens freelance fotograaf en Adobe Photoshop Certified Expert (CS3). Hij is auteur van het boek ‘Lightroom 2 Ontmaskerd’ en geeft inleidende en gevorderde workshops rond Adobe Lightroom. Behalve zijn Lightroom, kent Piet ook zijn Speedlights: vorig jaar doorkruiste hij Zuid-Oost Azië en India per fiets, gewapend een digitale reflex, een flits en een flitsparaplu.

Wat leer je allemaal op ‘From Speedlight to Lightroom’?

In ‘From Speedlight to Lightroom‘ neemt Jürgen het “speedlight” gedeelte voor zijn rekening. Hij gaat hierbij in op de verschillende aspecten van flitsfotografie; hoe stel je je camera in? Hoe stel je je flits in? Hoe krijg je zacht of hard licht? Wat doen kleurfilters? Hoe werk je met meerdere flitsen? Hoe mix je flitslicht met omgevingslicht om tot dynamische beelden te komen, …?

De theorie wordt uitgelegd aan de hand van vooraf opgenomen beelden, die de verschillende flitstechnieken en belichtingsmethoden illustreren.

Je ontvangt  deze beelden digitaal alsook de een toelichting met instellingen van camera en flits. Zo kan je thuis de verschillende setups nog eens overdoen.

Na deze inleiding – die ongeveer 2 uur duurt – trekken we de buitenlucht in voor de praktijk. Als cursist krijg je zelf volop de gelegenheid om de theorie in te oefenen in verschillende scenario’s, onder begeleiding van Jürgen en Piet. Uiteraard is er een model van de partij.

Nadien neemt Piet over voor het gedeelte ‘nabewerking in Lightroom’. Na een inleiding rond Lightroom, bewerken we je beste foto’s. Je zult met Lightroom het onderste uit je Raw-bestand halen en dezelfde foto volgens verschillende stijlen ontwikkelen. Je krijgt meteen ook de basis mee van een goede en efficiënte Lightroom-workflow.

Tot slot van deze goedgevulde dag wordt je favoriete foto afgedrukt op een state-of-the-art inkjetprinter.

Praktisch:

Deze all-inclusive workshop wordt gelanceerd aan de introductieprijs van 195 € (incl. BTW) en omvat:

  • een syllabus over flitsfotografie
  • vooraf opgenomen beelden en bijhorende uitleg
  • koffie, frisdranken & versnaperingen
  • broodjeslunch
  • model (voor alle duidelijkheid: het model mag je niet meenemen!)
  • grootformaat print

Wat moet je zelf meebrengen?

  • Je camera + lenzen
  • Een losse flits, indien je die hebt (anders leen je er gerust een van ons)
  • Een laptop, indien je die hebt, met Lightroom 2 (eventueel een trial-versie). Voorkennis is niet nodig. Je kan de trial versie hier downloaden.
  • De energie om er een boeiende dag lang fotografisch in te vliegen!

De workshop start om 9u stipt, ontvangst vanaf 8u30. Details ontvangt u op het moment van inschrijven.

Inschrijven

Het aantal deelnemers is beperkt. Inschrijven kan via mail naar speedlight [at] jurgendoom [dot] be (voor Leuven, 13 maart) of speedlight [at] lightroom [dot] be (voor Gent, 24 april).

Je kan Jürgen ook contacteren via de contactpagina van deze site.
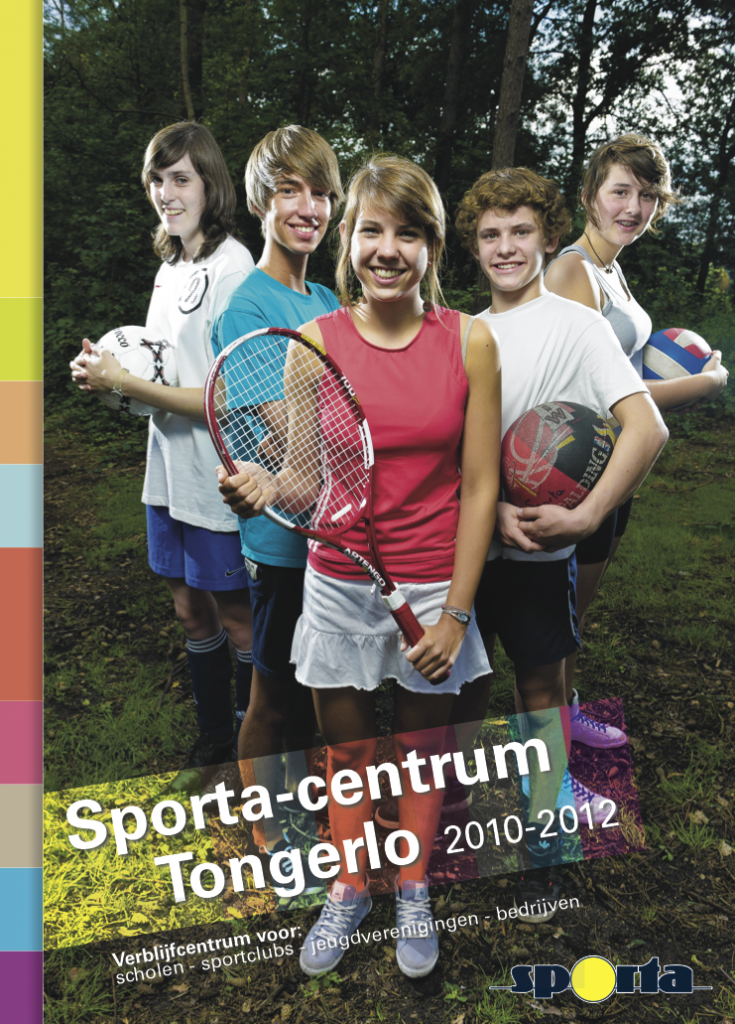
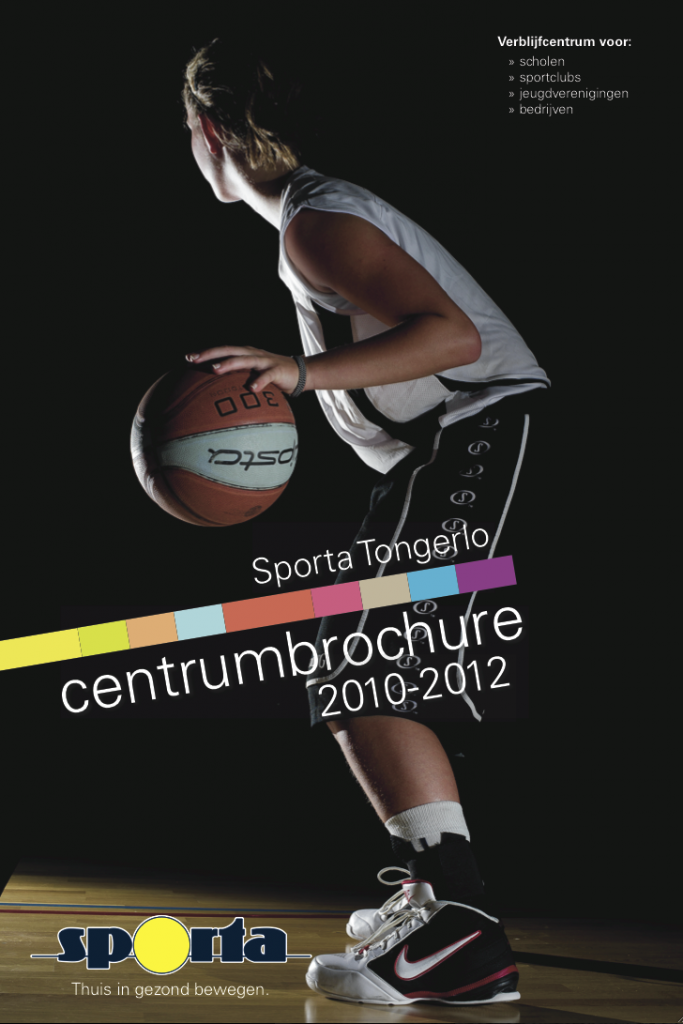
Cover photograph for Sporta Brochure: which one would you choose? Cover A or cover B?

15 September 2010 om 10:46 door Jürgen geplaatst in de categorie Commercial,Photography,Portrait

As a photographer, trying to satisfy the needs of your clients, it is sometimes a difficult exercise to meet your clients view with your own.  However, as a professional photographer, creating images that have a high impact, you want to deliver photographs that your clients can use and not only what you think your client should use.

During the assignment for Sporta – a centre that provides training facilities for all sorts of athletes in varying disciplines – I photographed many setups and situations, one of which we thought would be useful for the cover of the brochure.  But when it eventually came down to choosing the cover photograph, it proved to be more difficult than expected.

My opinion was fairly clear from the start on how I saw the cover photograph (but my opinion doesn’t count), but even the art-director’s opinion wasn’t 100% on par with the opinion of the board of directors.

Eventually, the art director came up with 2 versions of the cover, which are listed below.

Which one would you choose and why?  Cover A or Cover B?

Please leave your comments in the comment section …

Photo A

Suggestion A for the cover of the Sporta Centrum Brochure.

Suggestion A for the cover of the Sporta Centrum Brochure.

Cover B

Suggestion B for the cover of the Sporta Centrum Brochure.

Suggestion B for the cover of the Sporta Centrum Brochure.

Photography for “Sporta centrumbrochure”

13 September 2010 om 14:37 door Jürgen geplaatst in de categorie Commercial,Flashlight

As a photographer, specialising in high-end corporate photography, I was commissioned by Sporta to photograph their new brochure.  The assignement was very broad, because I had to photograph sporters, but also their accommodation and training facilities at their sports centre in Tongerlo, Belgium.

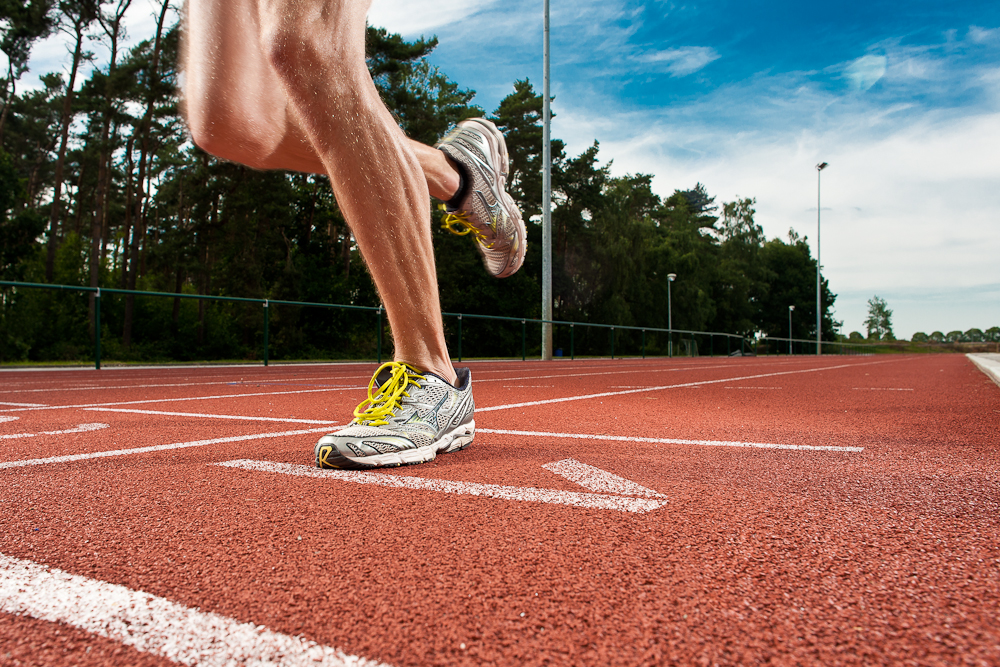
One of the images we did was of an athlete who was busy training on the athletic track.  We wanted a high-impact image that could run as a double spread in the brochure.

The final result is the image below.  It was shot during a sunny day, but by adjusting the lighting, using 2 Nikon SB 900’s flashes and little post-production in lightroom, we created this image (shot on Nikon D3x).  The hardest part of the image was to direct the athlete to be at the right place in the right position.

Double spread for Sporta Centrumbrochure

Double spread for Sporta Centrumbrochure

Workshop flash photography

2 September 2010 om 10:56 door Jürgen geplaatst in de categorie Flashlight,Gear,Photography,Portrait,workshop

I’ve always wanted to pass on knowledge.

When I was a kid, I wanted to become a teacher.  Things turned out differently, as I studied engineering.  I ended up “consulting” in the building industry, which was mainly a “teaching” job.  After I switched to photography – something I’m so grateful for – I still had the urge to share my knowledge about photography with other people.

That’s how I started to do workshops in photography, with a special emphasis on flash photography (together with my partner in crime Piet Van den Eynde, who’s the benchmark when it comes down to teaching about Lightroom).

And that’s exactly why the “Nationale Vereniging van Beroepsfotografen” (National federation of professional photographers) contacted me to conduct a workshop for their members.

So I organised an afternoon of going through my recent portfolio, thereby explaining how I photographed the images and how the lighting was done.  An interesting exercice, both for me (because I sometimes had to reverse engineer my own images) as well as for the participants, providing enough questions to fill a book on flash photography.

After that we went outside for a  demonstration of flash photography in the field (that’s what one does during workshops on flash photography, not?).  We went to a nearby underpass (I have loads of them in the neighbourhood) were the light was rather dim, but where we had a bit of grafity.

We picked Carl as our ad-hoc model.  Carl is a fantastic photographer with loads of experience and a master in lighting.  I just count my blessings Carl lives about 2 hours drive out of where I live (and the fact that Carl mainly works in a studio environment also helps).

So, both myself and Carl were challenged.  Myself, because I had a master in photography in front of my camera and Carl, because he’s much more comfortable BEHIND the lens in stead of in front of it!

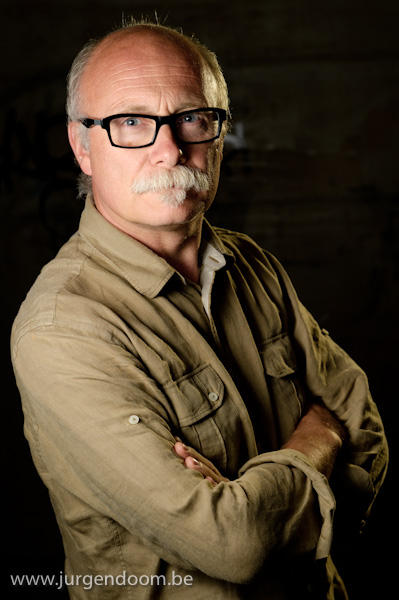
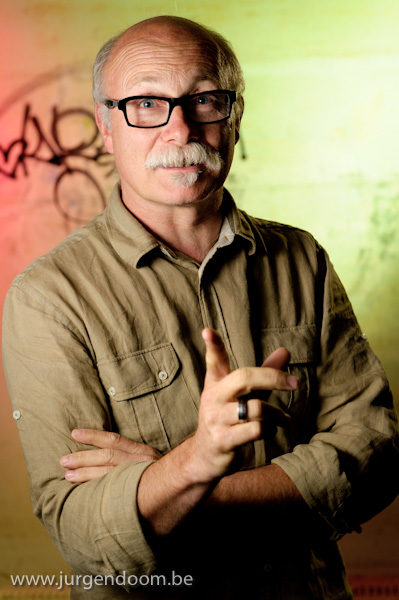
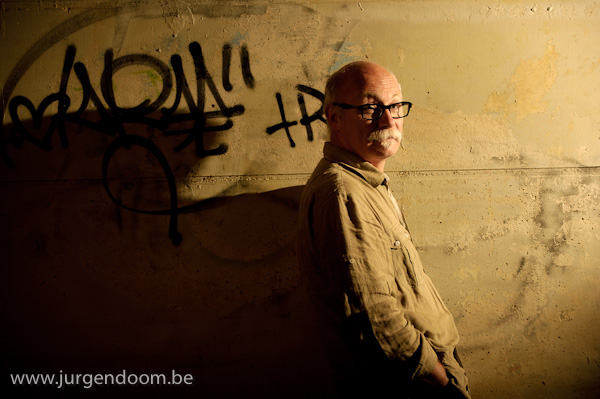
Nevertheless, I tried to explain to the participants the different stages in the lighting setup that one can go through.  So we started with a simple setup, which is an Nikon SB900 flash to camera left, on a stand and shot through a shoot-through umbrella providing the key on Carl’s face.  On camera right, behind Carl, is a bare flash (also Nikon SB900) with a full-cut CTO as a kicker light, enhancing the separation between Carl and the background.

Carl, during a workshop on flash photography, lit by 2 SB900 speedlights

Carl, during a workshop on flash photography, lit by 2 SB900 speedlights

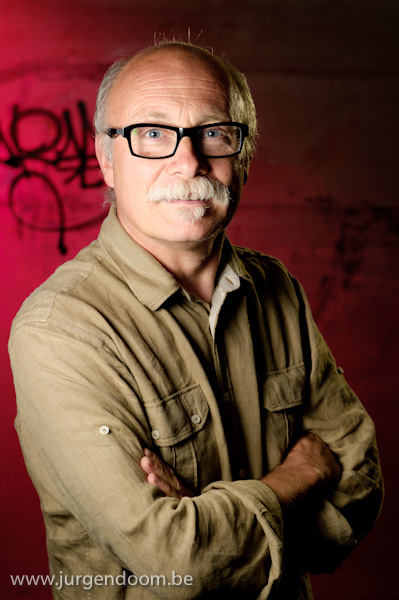
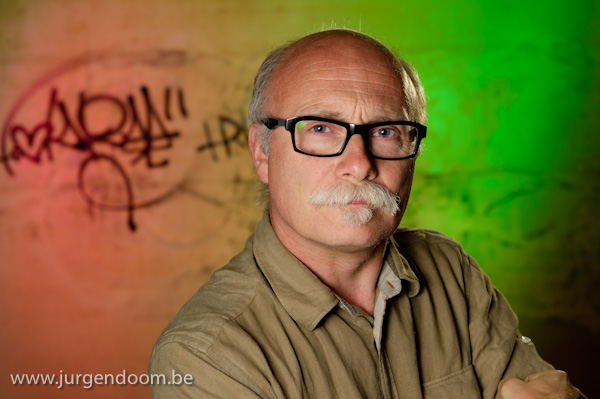
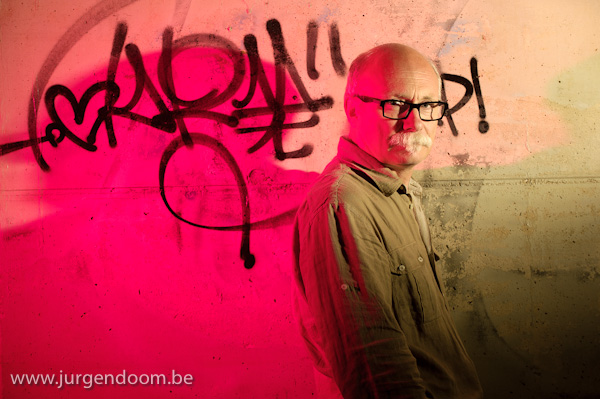
By adding a third SB900 with a red filter, aimed at the background, we created a more dramatic portrait.

Carl, lit by 3 Nikon SB 900 flashes

Carl, lit by 3 Nikon SB 900 flashes

To demonstrate how to add another color into the mix, we aimed a fourth SB900, with a light green gel, on the the wall as well, opposite from the red spot.

Carl, lit by 4 Nikon SB 900 flashes

Carl, lit by 4 Nikon SB 900 flashes

We wanted to emphasise the green even more, so we replaced the light green by a dark green gel, which resulted in the next image.

Carl, lit by 4 Nikon SB 900 flashes

Carl, lit by 4 Nikon SB 900 flashes

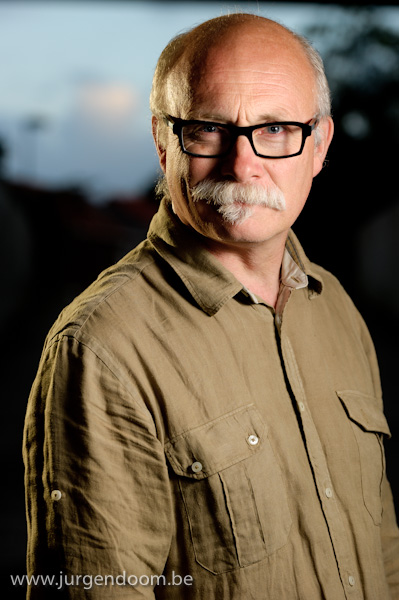
In order to demonstrate the versatility of working with small flashes out in the field, I asked Carl to turn 90 degrees to his right.  I also switched positions, slightly adapted the direction of the flashlights and photographed Carl against a backdrop of houses and sky.

Carl, lit by 2 Nikon SB 900 flashes

Carl, lit by 2 Nikon SB 900 flashes

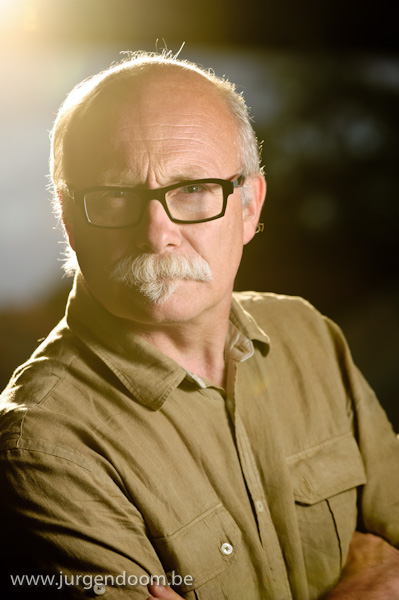
By readjusting the kicker light, coming from behind (camera left) you can create the illusion of a setting sun behind the subject.  This is what we wanted to demonstrate with this image.

Carl, lit by 2 Nikon SB 900 flashes

Carl, lit by 2 Nikon SB 900 flashes

Or, alternatively, changing the white balance of your camera in conjunction with the creative use of color gels creates this moody, late night atmosphere – a minute after the sunset image ….

Carl, lit by 2 Nikon SB 900 flashes

Carl, lit by 2 Nikon SB 900 flashes

To wrap up the workshop, I demonstrated  the difference between 1 flash and the use of 2 flashes, one of which was provided with a red gel.  The clue is that the red only (or predominantly) shows in the shadow areas, created by the main light on camera right.

Carl, lit by 1 Nikon SB 900 flash

Carl, lit by 1 Nikon SB 900 flash

Carl, lit by 2 Nikon SB 900 flashes

Carl, lit by 2 Nikon SB 900 flashes

I’ve always wanted to pass on and share my knowledge about photography, so if you’re interested in a workshop about photography or a workshop about flash photography, don’t hesitate to contact me.  I’m available for workshops and  teaching world wide.