workshop « Jurgen Doom

From workshop model to cover girl – it’s just a small flash away …

6 September 2011 om 10:57 door Jürgen geplaatst in de categorie cover,fashion,fashion photography,Flashlight,fotografie,photographer,Photography,strobist,workshop,workshop fotografie

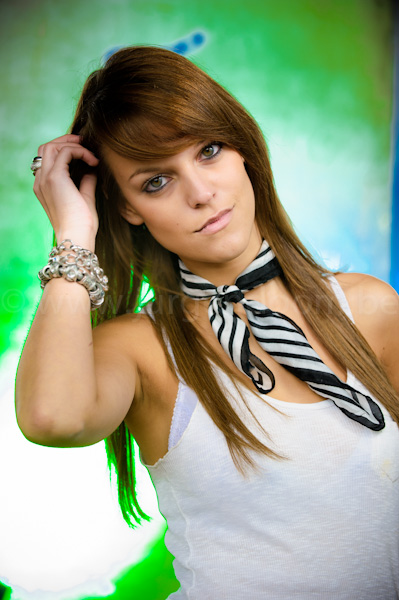
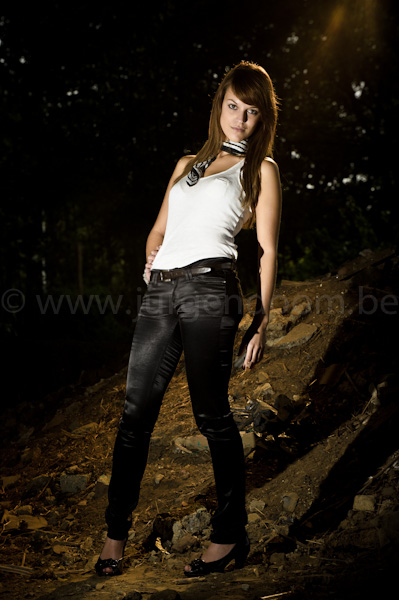
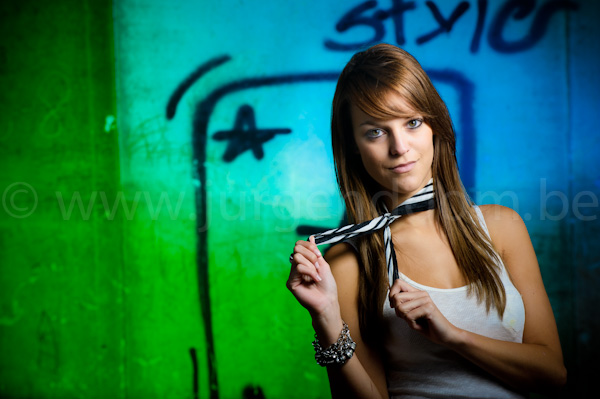
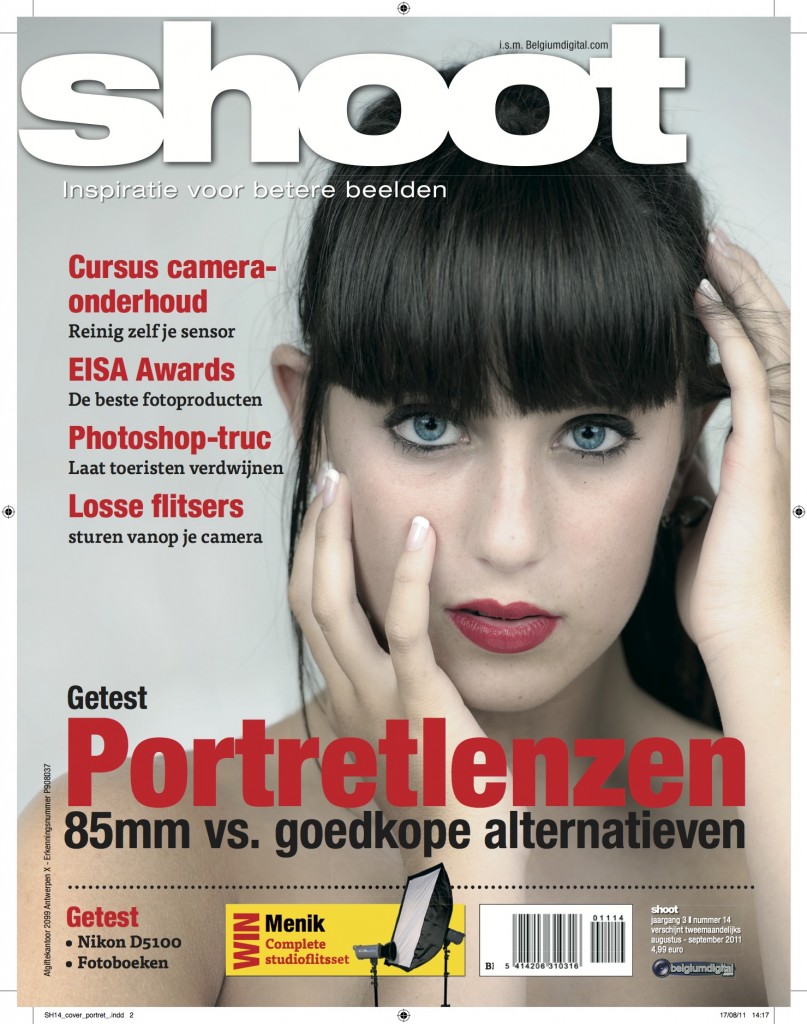
From model to cover, it sounds just like the title of a new workshop.  Well, it was during a Strobist workshop – a workshop on flash photography with small, portably reportage flashes – that this image was created.

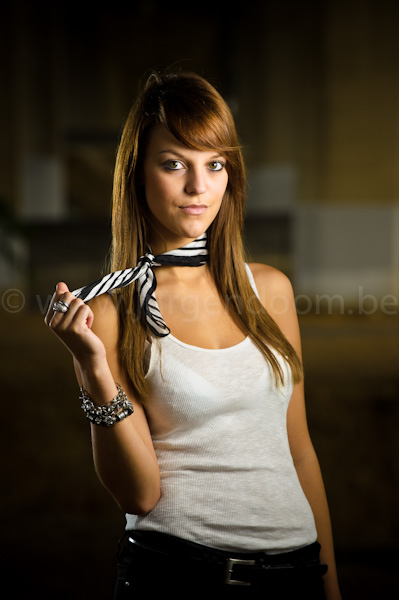
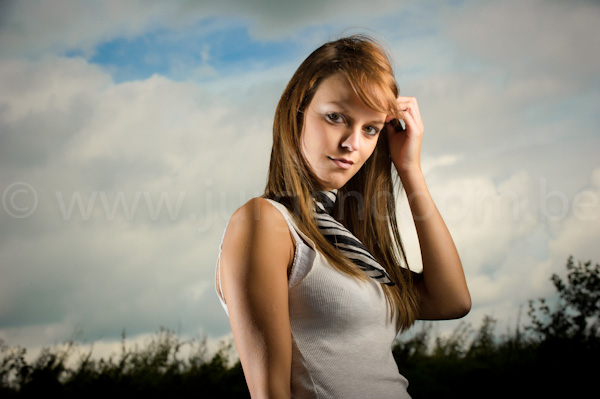
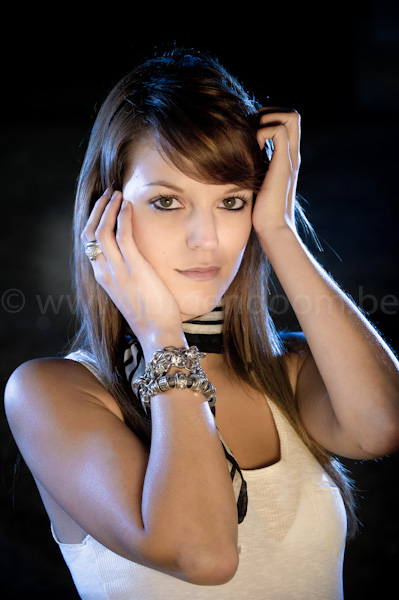
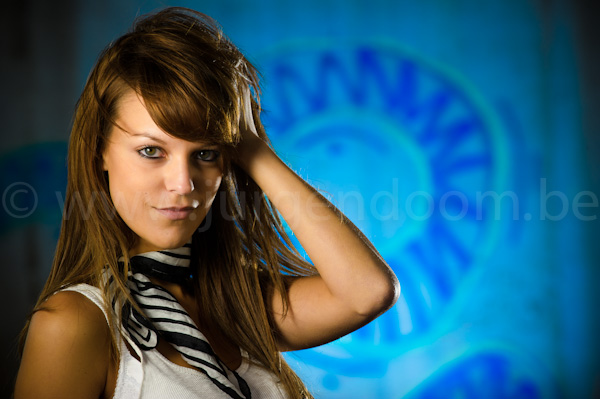
After the participants had asked me a lot about how to get a white background white, or how to get it black, I asked our model Shauni if she could pose for me for a few minutes.

I had placed 2 small flashes – Nikon SB900 – on either side of Shauni, using umbrellas and triggered boths flashes with Nikons CLS-system.  The only thing I added to the creative mix was a silver reflector to throw the light back at Shauni, in order to create soft, beautiful light (which she deserves).

The result is as can be seen on the cover of Shoot magazine. In this particular issue, which is on-sale in Belgium from now on, I have written an article – together with Piet Van den Eynde, colleague and partner in crime for the flash workshops – about the Nikon CLS – system.

Anyhow, this is the result as it appears on the cover of the magazine.


Cover for Shoot magazine, shot during a workshop on flash photography


And that’s how a model for a workshop can end up as a model of the cover of a photography magazine.  Thanks Shauni!


Workshop flash photography

2 September 2010 om 10:56 door Jürgen geplaatst in de categorie Flashlight,Gear,Photography,Portrait,workshop

I’ve always wanted to pass on knowledge.

When I was a kid, I wanted to become a teacher.  Things turned out differently, as I studied engineering.  I ended up “consulting” in the building industry, which was mainly a “teaching” job.  After I switched to photography – something I’m so grateful for – I still had the urge to share my knowledge about photography with other people.

That’s how I started to do workshops in photography, with a special emphasis on flash photography (together with my partner in crime Piet Van den Eynde, who’s the benchmark when it comes down to teaching about Lightroom).

And that’s exactly why the “Nationale Vereniging van Beroepsfotografen” (National federation of professional photographers) contacted me to conduct a workshop for their members.

So I organised an afternoon of going through my recent portfolio, thereby explaining how I photographed the images and how the lighting was done.  An interesting exercice, both for me (because I sometimes had to reverse engineer my own images) as well as for the participants, providing enough questions to fill a book on flash photography.

After that we went outside for a  demonstration of flash photography in the field (that’s what one does during workshops on flash photography, not?).  We went to a nearby underpass (I have loads of them in the neighbourhood) were the light was rather dim, but where we had a bit of grafity.

We picked Carl as our ad-hoc model.  Carl is a fantastic photographer with loads of experience and a master in lighting.  I just count my blessings Carl lives about 2 hours drive out of where I live (and the fact that Carl mainly works in a studio environment also helps).

So, both myself and Carl were challenged.  Myself, because I had a master in photography in front of my camera and Carl, because he’s much more comfortable BEHIND the lens in stead of in front of it!

Nevertheless, I tried to explain to the participants the different stages in the lighting setup that one can go through.  So we started with a simple setup, which is an Nikon SB900 flash to camera left, on a stand and shot through a shoot-through umbrella providing the key on Carl’s face.  On camera right, behind Carl, is a bare flash (also Nikon SB900) with a full-cut CTO as a kicker light, enhancing the separation between Carl and the background.
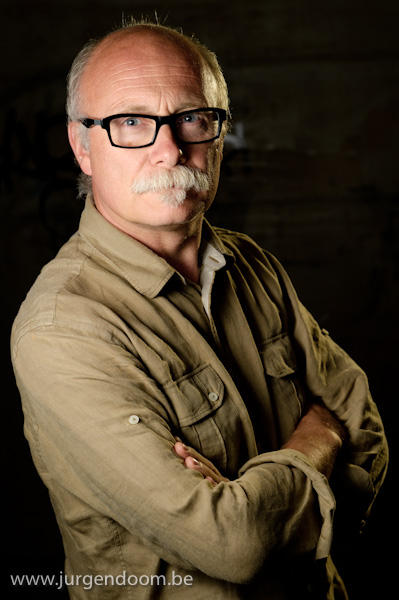
Carl, during a workshop on flash photography, lit by 2 SB900 speedlights

Carl, during a workshop on flash photography, lit by 2 SB900 speedlights

By adding a third SB900 with a red filter, aimed at the background, we created a more dramatic portrait.
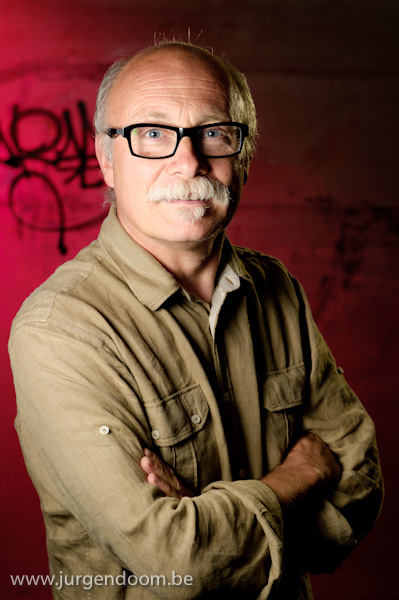
Carl, lit by 3 Nikon SB 900 flashes

Carl, lit by 3 Nikon SB 900 flashes

To demonstrate how to add another color into the mix, we aimed a fourth SB900, with a light green gel, on the the wall as well, opposite from the red spot.
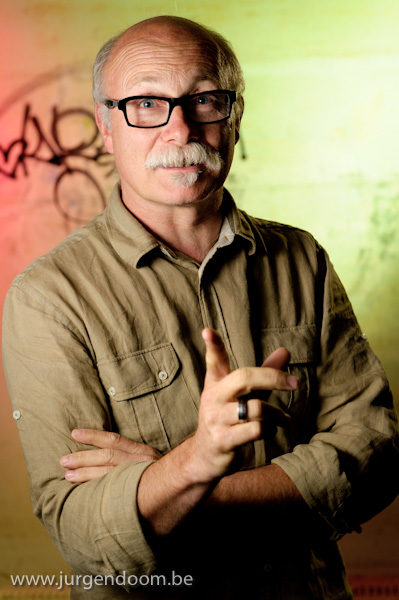
Carl, lit by 4 Nikon SB 900 flashes

Carl, lit by 4 Nikon SB 900 flashes

We wanted to emphasise the green even more, so we replaced the light green by a dark green gel, which resulted in the next image.
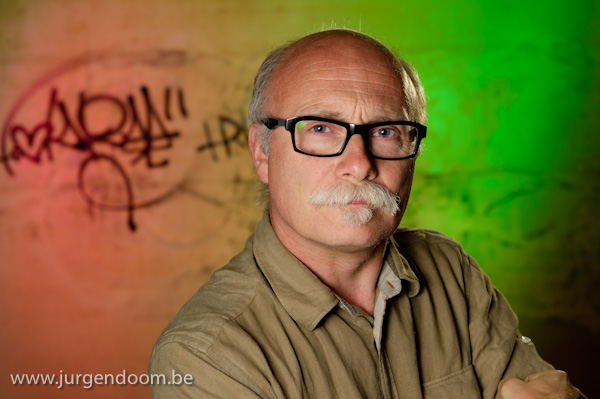
Carl, lit by 4 Nikon SB 900 flashes

Carl, lit by 4 Nikon SB 900 flashes

In order to demonstrate the versatility of working with small flashes out in the field, I asked Carl to turn 90 degrees to his right.  I also switched positions, slightly adapted the direction of the flashlights and photographed Carl against a backdrop of houses and sky.
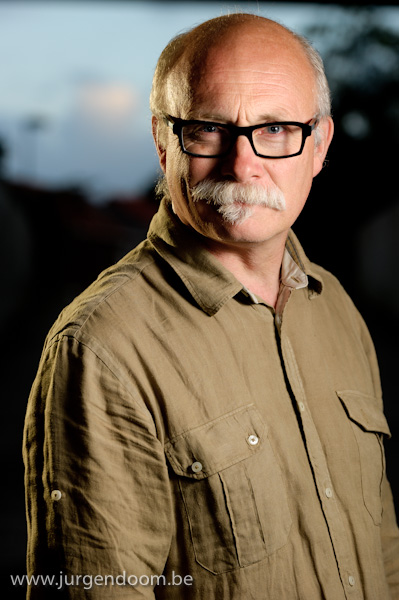
Carl, lit by 2 Nikon SB 900 flashes

Carl, lit by 2 Nikon SB 900 flashes

By readjusting the kicker light, coming from behind (camera left) you can create the illusion of a setting sun behind the subject.  This is what we wanted to demonstrate with this image.
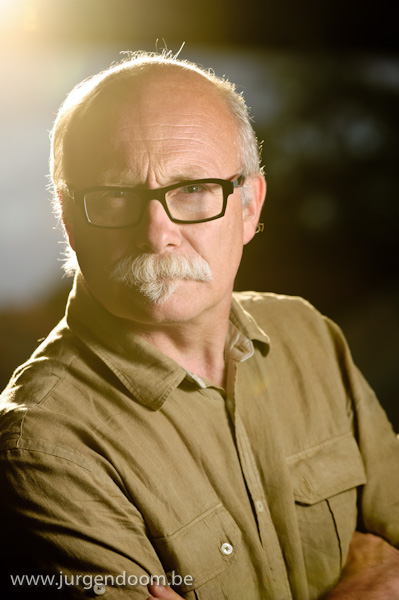
Carl, lit by 2 Nikon SB 900 flashes

Carl, lit by 2 Nikon SB 900 flashes

Or, alternatively, changing the white balance of your camera in conjunction with the creative use of color gels creates this moody, late night atmosphere – a minute after the sunset image ….
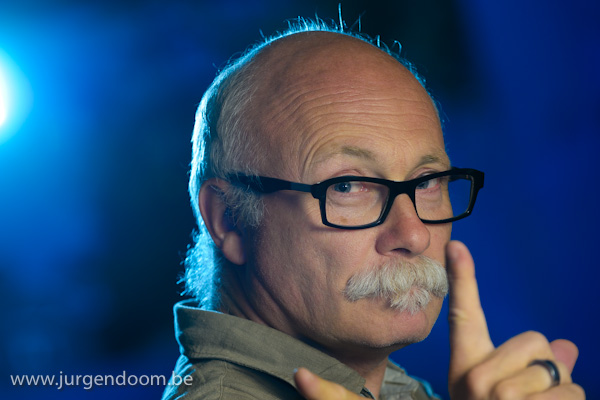
Carl, lit by 2 Nikon SB 900 flashes

Carl, lit by 2 Nikon SB 900 flashes

To wrap up the workshop, I demonstrated  the difference between 1 flash and the use of 2 flashes, one of which was provided with a red gel.  The clue is that the red only (or predominantly) shows in the shadow areas, created by the main light on camera right.
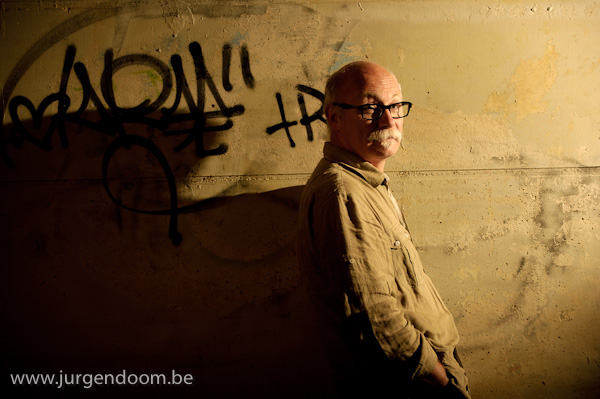
Carl, lit by 1 Nikon SB 900 flash
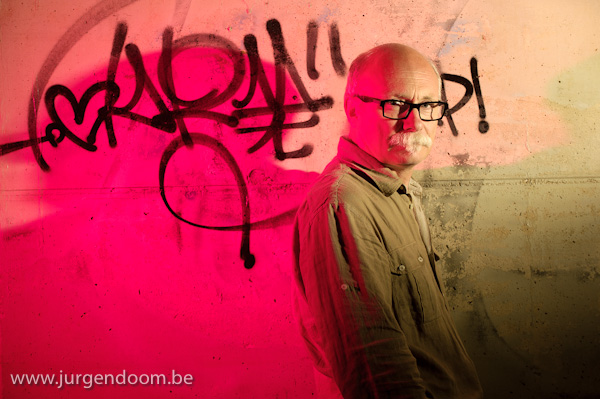
Carl, lit by 1 Nikon SB 900 flash

Carl, lit by 2 Nikon SB 900 flashes

Carl, lit by 2 Nikon SB 900 flashes

I’ve always wanted to pass on and share my knowledge about photography, so if you’re interested in a workshop about photography or a workshop about flash photography, don’t hesitate to contact me.  I’m available for workshops and  teaching world wide.
Workshop flitsfotografie & lightroom

20 August 2010 om 09:43 door Jürgen geplaatst in de categorie Flashlight,workshop

workshop flitsofotografie & Lightroom

workshop flitsofotografie & Lightroom


Voor de 4de keer hebben Piet van den Eynde van “MoreThanWords” en mezelf met succes de workshop flitsfotografie en lightroom georganiseerd (From speedlight to lightroom), waar we de basisbeginselen van flitsfotografie op locatie, alsook een initiatie Lightroom3 geven.

Piet neemt in de namiddag vooral het gedeelte “Lightroom3″ op zich – Piet is expert, expert en euh … expert op het vlak van lightroom, en bij uitbreiding beeldverwerking”, waar ik in hoofdzaak het woord neem bij het eerste gedeelte van de dag, namelijk het “speedlight” gedeelte, oftwel het gedeelte waarin toegelicht wordt hoe je met losse reportageflitsen (die dingen op batterijen, dus geen studio flitsen) op locatie toch beelden kan maken die het gemiddelde ver overstijgen.

workshop flitsofotografie & Lightroom

Voor de eerste keer echter werd deze workshop tijdens een weekdag georganiseerd, waardoor we al gauw volgeboekt waren met collega fotografen uit de 4 windstreken van het land (van Kortemark tot Tongeren ….).  In tegenstelling tot de vorige workshop zijn we deze keer niet zo heel lang moeten blijven stilstaan bij sluitertijd, diafragma en ISO, maar konden we vrij snel tot de essentie van de zaak overgaan.  Aan de hand van een heel aantal portfoliobeelden – beelden die ik in de afgelopen 6 maanden voor klanten gemaakt heb – bespraken we hoe die beelden gemaakt zijn, wat de plaats van de lichten was, welke hulpmiddelen ik gebruikte, wat de camera instellingen waren, wat de moeilijkheden waren bij het fotograferen (en hoe ze opgelost werden), etc ….

Na deze interactieve bespreking, die heel veel vragen losweekte en die ons toeliet om een verscheidenheid aan technieken te illustreren en te becommentariëren, trokken we het “veld” in voor een oefensessie – een “hands-on” workshop.  Eerst werd daarbij geïllustreerd hoe je op locatie tewerk moet gaan wanneer je met reportageflitsen een portret wil maken.  Daarbij kwamen zowel camerainstellingen aan bod, als hoe je flitsen instellen, hoe je flitsen aansturen, het gebruik van softboxen en kleurenfilters, etc ….workshop flitsofotografie & Lightroom

Na een paar setups namen Piet en mezelf dan de cursisten “bij het handje” om zelf een paar setup te laten uitvoeren, waardoor de praktische vragen naar boven begonnen komen.

Uiteindelijk eindigden we de fotosessie met een heel aantal diverse beelden op onze kaartjes, en keerden we terug voor een middagmaal waar we de shoot besproken.

Ondertussen haalde Piet alle foto’s van alle deelnemers binnen in Lightroom en gebruikte die dan voor de namiddagsessie, om aan de hand van die foto’s een initiatie over Lightroom3 te kunnen geven.  Zo konden de deelnemers aan de workshop ogenblikkelijk het resultaat van hun noeste arbeid in de voormiddag bekijken, kregen ze ogenblikkelijk een zicht op hoe snel de workflow binnen Lightroom werkt en hoe de reeds mooie beelden op een heel snelle manier gecatologeerd, geordend, bewerkt en geëxporteerd kunnen worden.

Om een en ander te verduidelijken volgt hieronder dan een bloemlezing van een aantal beelden die ik gisteren maakte.

Heb je ook interesse in zo’n workshop, contacteer ons dan gerust (via de contactpagina van mijn site) of lees er meer over op de pagina over workshops.

workshop flitsofotografie & Lightroom

workshop flitsofotografie & Lightroom

workshop flitsofotografie & Lightroom

workshop flitsofotografie & Lightroom

workshop flitsofotografie & Lightroom

workshop flitsofotografie & Lightroom

workshop-sl2lr-63